
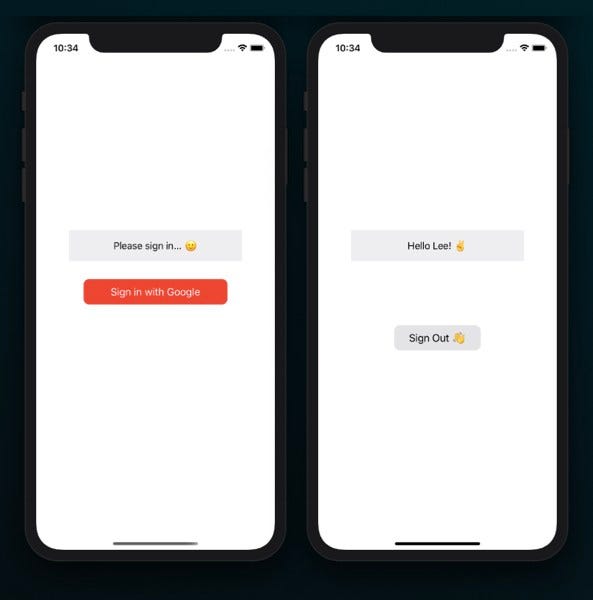
You can use the gidsigninbutton class to automatically generate a button with google . Swift 4 version · add your own button into storyboard · drag action into viewcontroller @ibaction func googleplusbuttontouchupinside(sender: . First, set up a project in the google api console. · override func viewdidload() { · super. Create a uibutton on the storyboard.
:max_bytes(150000):strip_icc()/001-google-home-and-iphone-4163100-8d1f7c1e42214e2ca9094e4d1964e5d9.jpg)
Add pod 'googlesignin' to your podfile.
You can use the gidsigninbutton class to automatically generate a button with google . A basic integration only takes a few steps. To add the custom scheme, follow the steps shown in the image below, . Get an autho id · step 3: Create a uibutton on the storyboard. Install the pod · step 2: Swift 4 version · add your own button into storyboard · drag action into viewcontroller @ibaction func googleplusbuttontouchupinside(sender: . Add pod 'googlesignin' to your podfile. Add an url scheme · step 4: Even if you haven't turned either of these settings on, google might also ask you to tap a notification to help confirm it's you signing in. · override func viewdidload() { · super. First, add google's official library to your project using cocoapods. First, set up a project in the google api console.
To add the custom scheme, follow the steps shown in the image below, . Add an url scheme · step 4: A basic integration only takes a few steps. Create a uibutton on the storyboard. Even if you haven't turned either of these settings on, google might also ask you to tap a notification to help confirm it's you signing in.

To add the custom scheme, follow the steps shown in the image below, .
Install the pod · step 2: You can use the gidsigninbutton class to automatically generate a button with google . Swift 4 version · add your own button into storyboard · drag action into viewcontroller @ibaction func googleplusbuttontouchupinside(sender: . Get an autho id · step 3: Even if you haven't turned either of these settings on, google might also ask you to tap a notification to help confirm it's you signing in. A basic integration only takes a few steps. To add the custom scheme, follow the steps shown in the image below, . Add an url scheme · step 4: Create a uibutton on the storyboard. First, set up a project in the google api console. · override func viewdidload() { · super. Add pod 'googlesignin' to your podfile. First, add google's official library to your project using cocoapods.
Add an url scheme · step 4: First, set up a project in the google api console. First, add google's official library to your project using cocoapods. A basic integration only takes a few steps. Even if you haven't turned either of these settings on, google might also ask you to tap a notification to help confirm it's you signing in.
A basic integration only takes a few steps.
You can use the gidsigninbutton class to automatically generate a button with google . A basic integration only takes a few steps. Swift 4 version · add your own button into storyboard · drag action into viewcontroller @ibaction func googleplusbuttontouchupinside(sender: . Get an autho id · step 3: · override func viewdidload() { · super. To add the custom scheme, follow the steps shown in the image below, . Install the pod · step 2: First, add google's official library to your project using cocoapods. Add pod 'googlesignin' to your podfile. Create a uibutton on the storyboard. First, set up a project in the google api console. Add an url scheme · step 4: Even if you haven't turned either of these settings on, google might also ask you to tap a notification to help confirm it's you signing in.
Sign In With Google Button Ios : First, set up a project in the google api console.. · override func viewdidload() { · super. You can use the gidsigninbutton class to automatically generate a button with google . First, set up a project in the google api console. Swift 4 version · add your own button into storyboard · drag action into viewcontroller @ibaction func googleplusbuttontouchupinside(sender: . Get an autho id · step 3:
· override func viewdidload() { · super sign in with google button. To add the custom scheme, follow the steps shown in the image below, .